Welcome to the world of distance learning. Many teachers were suddenly thrown into technology this year, many with little to no experience with technology. Prior to the pandemic, many teachers who were not comfortable with technology could get away with doing the bare minimum or nothing at all. This is not a bad thing either. I think that the different teaching styles helped to create a balanced learning program for our students.
However, insert a world-wide pandemic that forced everyone home and onto the computer. Now teachers everywhere need to increase their technological awareness to meet remote learning demands.
One basic, but particularly important question is how to assign work through your learning management system. For those of you new to this, a learning management system is a software application for the administration, documentation, tracking, reporting, and delivery of educational courses, training programs, or learning and development programs. In layman’s terms, a learning management system would be your Google Classroom, Schoology, SeeSaw, etc.
For users of Google Classroom and Schoology, I have made screencasts to help walk you through these steps.
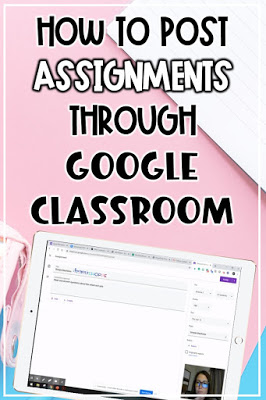
How to Post Assignments in Google Classroom:
- First, open Google Classroom and select the course you want to assign to.
- Click “Classwork” toward the top center of the screen.
- Click “Create” and choose “Assignment” in the drop down menu.
- Title the assignment and give it a description.
- Click “Add” and choose what you want to add (Google Slides, PDF, link, Youtube video, etc)
- To the right, modify the options. You can choose to send to the entire class or certain students, assign point value, topic, and due date, or attach a rubric.
- When you are finished, click “Assign” in the top right corner (purple button) and choose whether you want to assign it now or schedule it to be assigned in the future.
There have been some glitches in Google Classroom. Some people have reported that GC is not making a copy of the assignment for EVERY student. If this happens, Google Classroom recommends that you
– Give Google some time for the students to open the assignment after you create it. According to Google, a lot of stuff is happening behind the scenes. So if you create an assignment on the fly (who hasn’t) and tell your kids to open it immediately, there could be some trouble because the Google gnomes haven’t had enough time to make all those copies yet. So give it a few minutes.
– It is also recommended that the assignment is created in the “Classwork” area.
If the student does not see the “Turn it in” button, make sure that the student has fully opened the assignment and was working on it. At the present time, Google does not have a fix for it. You can refer to this post for up to date information.
How to Post Assignments in Schoology:
- First, open Schoology and select the course you want to assign to.
- Click “Add materials”.
- Choose “Add assignment”.
- Fill in all of the areas such as creating a title for the assignment, directions of what the students should be doing, assign a due date and point value, and category that the assignment falls under. (Categories would be made ahead of time, such as homework, classwork, assessment, lab, etc).
- You also have the option to attach a file, link, image, or pull from your Google Drive, or MS OneDrive.
- When you have finished, simply click “create” and your assignment will be published.
- One downfall of Schoology is that you cannot schedule assignments ahead of time like in Google Classroom. You can create assignments and choose to “unpublish” them so that the students cannot see. When you are ready, you would need to go back into Schoology to publish them.
New to Schoology and need a lowdown on the basics? You’ll want to read this post that details the basic features of Schoology.
- Teaching tips for the distance learning classroom
- Easy (and free) tech ideas to engage remote learners
- How to QUICKLY and EASILY create movable pieces for your digital lessons and activities
- Assign certain slides from a Google Slide presentation
- How to Extract Pages from a PDF to Digitally Assign to Your Students
Need more digital tips? Sign up to get more great tips to make your life easier and your teaching life more FUN!
Sign up


