If you’ve ever handed out a science worksheet with a graph and immediately heard, “I hate graphs” or “I’m bad at math,” you’re definitely not alone. Graphs ask students to read, do math, and make sense of scientific ideas all at the same time, which can feel overwhelming for many kids in grades 4–8.
Over the past few years, I’ve noticed that when students shut down on graphing in science, it has very little to do with the content of the unit and a lot to do with confidence. The good news is that with a few intentional routines, along with the right kind of practice, students can move from “I hate graphs” to “I can do this.”
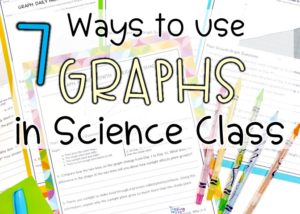
In this post, I’m sharing simple, classroom-tested ways to build confidence interpreting graphs in science, plus a force and motion graphing activity you can plug right into your current unit.
Why students struggle with interpreting graphs in science
Before we fix the problem, it helps to name it clearly. Here are some of the most common struggles I see with interpreting graphs in science:
Students aren’t sure what each axis represents, so they don’t actually know what the graph is showing.
They treat every graph like a generic “math graph” and ignore the science context or story.
They’ve mostly practiced reading a single point (“What is the value at 4 seconds?”), not interpreting patterns like constant speed, speeding up, or slowing down.
Math anxiety kicks in as soon as they see numbers and lines, and they mentally check out before they even try.
When all of that collides on a test question that includes a distance vs time graph or a data table about force and mass, it’s no wonder students feel stuck.
That’s why I like to build graphing in gradually:
Start with basic types of graphs and vocabulary.
Move into general graphing in science practice.
Then layer in content-specific graphs, like force and motion.
Strategy 1: Start with types of graphs and axes language
For many students, confidence starts with simply knowing what they’re looking at.
I like to begin the year (or reset mid-year) by reviewing:
Bar graphs, line graphs, and picture graphs.
Titles, labels, keys, and what each axis represents.
The idea that graphs are “pictures of data” or a way to see how something changes.
My FREE Types of Graphs Digital Reading is perfect for this stage. Students read about all types of graphing in science, including bar graphs, line graphs, and picture graphs, in a kid-friendly passage and answer questions that force them to notice titles, labels, and what each graph is showing. It works well as:
An introduction before heavier graphing
A refresher if students are rusty
An easy digital assignment or sub plan
Once students are comfortable naming graph types and reading axes, you can start connecting those skills more directly to science content.

Strategy 2: Always start with “What is on each axis?”
One simple, powerful routine that changes everything: train students to read the axes out loud before they do anything else.
I have students pause and say:
“The x-axis is time (seconds), the y-axis is distance (meters). This is a distance vs time graph.” or
“The x-axis is time (seconds), the y-axis is speed (m/s). This is a speed vs time graph.”
This tiny habit:
Forces them to slow down and actually look at the labels.
Anchors their thinking in the meaning of the graph, not just the shape of the line.
Helps them separate distance vs time graphs from speed vs time graphs, which is a huge source of confusion later.

My Graphing in Science Worksheets for Practice and Interpreting Graphs are great for building this routine. They focus on:
Parts of a graph
Reading basic graphs
Interpreting what the data is telling us
Since the content is general “graphing in science” (not tied to one unit), students can concentrate on axes, titles, and patterns without also learning new vocabulary at the same time.
Try this in your next lesson: before anyone answers a question, ask the class in unison, “What is on each axis?” and have them respond aloud using your graphing pages.
Strategy 3: Move before you graph
Graphs feel a lot less scary when students have physically acted out the motion or scenario first.
Before handing out a more complex science graph, I like to:
Have students walk across the room at a steady pace, then stop and stand still, then speed up, then slow down. After each segment, we talk through what a sketch of that motion might look like.
Use toy cars or carts and mark their positions on the floor every few seconds with sticky notes, then transfer that data to a simple distance-time graph on the board.
Act out a “runner race” where one student walks slowly and another walks quickly so we can compare who is farther at different times.
Once students have felt what constant speed, speeding up, and stopping feel like in their bodies, it’s much easier for them to attach meaning to a slanted line, a flat line, or a changing slope.
After a quick movement activity, I transition into more formal practice with my Force and Motion Graphs and Data Tables (Grades 4–8). This resource includes clean, test-style graphs of carts, runners, and a bicycle, plus data tables about mass, force, and acceleration. Students can take what they just experienced and apply it on paper, without you needing to build new graphs from scratch.
Strategy 4: Focus on patterns, not just single points
Many students are used to “read the point” questions:
“What is the distance at 4 seconds?”
“What is the speed at 6 seconds?”
Those questions are fine, but they don’t build the deeper understanding students need for complex test items or real data analysis. To move them forward, start by asking about single points to make them feel confident and then shift to patterns.
“Where is the graph flat? What does that tell you about the motion?”
“Where is the line slanted upward? What does that mean?”
“Is the line getting steeper, less steep, or staying the same? How can you tell?”
“Compare the first half and the second half of the graph. Is the object moving the same way during both halves?”
Encourage students to use words like constant, increasing, decreasing, speeding up, slowing down, and at rest, with stems such as:
“From ___ to ___ seconds, the line is flat, so the object is at rest.”
“The distance increases by equal amounts in equal times, so the speed is constant.”
In the Graphing in Science Worksheets, students get lots of practice reading trends and patterns in data. Then the Force and Motion Graphs and Data Tables take that same skill and apply it directly to motion graphs: identifying constant speed from a straight line, recognizing an object at rest from a flat segment, or noticing where a speed-time graph shows speeding up vs slowing down.
Strategy 5: Build in quick wins and explanations
Confidence matters. If every graph question feels hard, students will decide they “can’t do graphs” and stop trying.
I like to structure practice so students get some quick wins first, then move into written explanations:
Start with 1–2 easier multiple choice or “read the value” questions so students can get a few correct answers under their belt.
Then add a question that asks them to explain what a flat section or steep section means in their own words.
Finally, bring in “student claim” items, such as:
“A student says, ‘The object is accelerating the whole time.’ Is this correct? Use evidence from the graph to support your answer.”
Sentence stems help support writing:
“The graph shows that…”
“Because the line is ____, I know that…”
“This claim is (correct/incorrect) because…”
The Force and Motion Graphs and Data Tables set is built with this mix in mind. Each page includes straightforward multiple choice questions and short answer/explain your thinking prompts. Students get some quick wins, then are nudged to justify whether a claim is correct using evidence from the graph or the data table. The perfect way to build on correctly interpreting graphs in science.
Strategy 6: Keep graphing skills alive with bell ringers
One of the best ways to build graphing confidence is to make graphs a normal part of science, not a rare event. Short, consistent practice goes a long way.

I like to use bell ringers for this. My Bell Ringer: Graphing in Science – Editable Interpreting Graphs Practice Skills is designed exactly for that purpose. You can:
Project a quick graph at the start of class and have students answer one or two short questions.
Use the editable version to plug in your own data related to your current unit.
Spiral question types: sometimes read-the-point, sometimes describe-the-pattern, sometimes choose which claim matches the graph.
Over time, students stop seeing graphs as something special and start seeing them as just another way we talk about science.
Strategy 7: Spiral graphing across topics, not just in one unit
Finally, think of graphing as a year-long skill, not a single lesson.
A possible pathway:
Use the FREE Types of Graphs Digital Reading to introduce or review basic graph types and vocabulary.
Move into Graphing in Science Worksheets to build general graph reading and interpreting skills.
Keep those skills alive with the Graphing in Science Bell Ringers as regular warm-ups or exit tickets.
When you reach your force and motion unit, use the Force and Motion Graphs and Data Tables to tie graphing directly to NGSS-aligned content on motion, force, and mass.
By the time test season rolls around, your students will have seen graphs in so many different contexts that they’re far less likely to panic when they appear on science assessments.
A ready-to-use option for motion graphs
If you’re ready to turn “I hate graphs” into “I can do this” in your force and motion unit, my Force and Motion Graphs and Data Tables (Grades 4–8) resource is an easy place to start.
Students will:
Read and interpret distance vs time and speed vs time graphs (carts, runners, a bicycle).
Analyze data tables about mass, force, acceleration, and balloon rockets.
Identify constant speed, speeding up, slowing down, and rest.
Evaluate student claims and explain their thinking using evidence from graphs and tables.
You can use the pages for whole group practice, small groups, independent work, or science test prep, just print and go.
At the same time, don’t forget the bigger picture: your Types of Graphs FREEBIE, Graphing in Science Worksheets, and Graphing Bell Ringers give you everything you need to build a year-long graphing routine, with this new force and motion set as the first content-specific piece in the series.